
【Windows11】メールアプリでアカウントを新規設定する方法
Windows10/11には、Outlookとは別で標準搭載の「メール」というアプリがあります。
個人で普通に基本的なメールの送受信ができればいい人には、この「メール」アプリで十分。
手軽にメール管理をすることができるのでおすすめです。
そこで今回は、Windows10/11標準搭載の「メール」アプリにアカウントを設定する方法を紹介します。
Windows10/11標準搭載の「メール」アプリとは?
「メール」アプリは、Windows10から標準搭載されている無料のメールアプリ。
メールの送受信をするための基本的な機能は備わっているので、スマホのように「基本的にメールのやりとりができればいい」という人にはおすすめです。
また、Windows10以前から使われているマイクロソフトのOutlookメールだけでなく、その他の様々なメールアドレスを一括で管理できます。
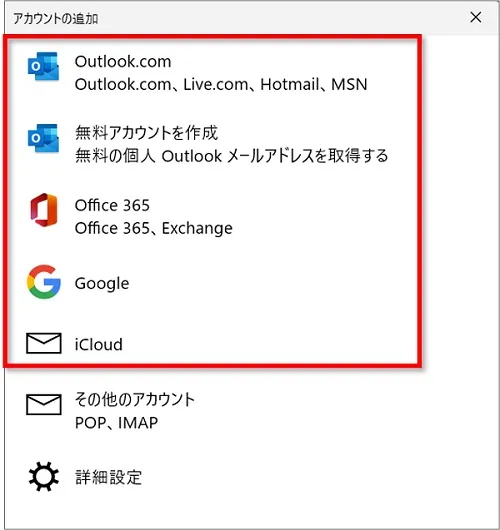
- 「outlook.com」や「hotmaill」などのマイクロソフトのフリーメールサービス
- Exchange
- Gmaill
- iCloud
- その他のアカウント(POP、IMAP)
- プロバイダーメール
マイクロスフォトのフリーメールやGmailなどを設定するときは、メールアドレスとパスワードを入力するだけで簡単に設定することができます。
「メール」アプリにアカウントを設定する方法
メールアプリを起動し、メールの送受信ができるようにアカウントを設定してみましょう。
 ちあき
ちあきここではWindows11で説明していますが、Windows10でもやり方は同じです。
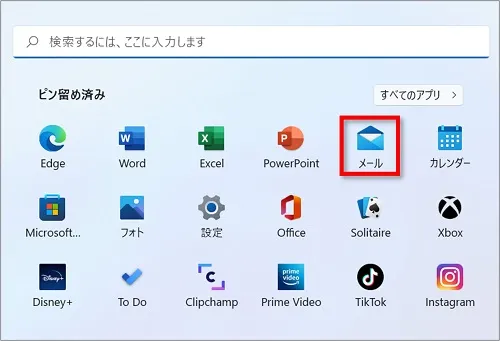
まずは「メール」アプリを起動します。
①「スタート」⇒「メール」をクリックします。

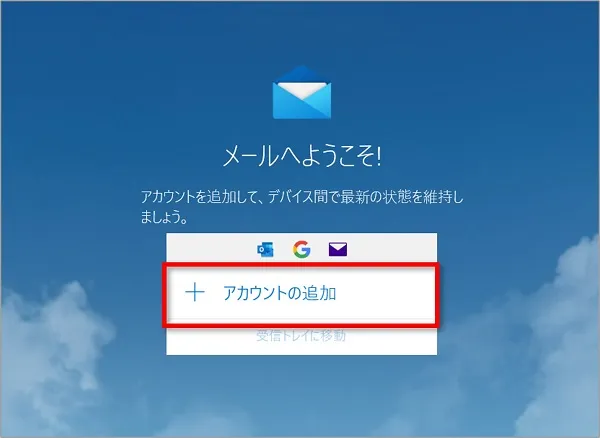
②「メール」アプリが起動したら、「アカウントの追加」をクリックします。
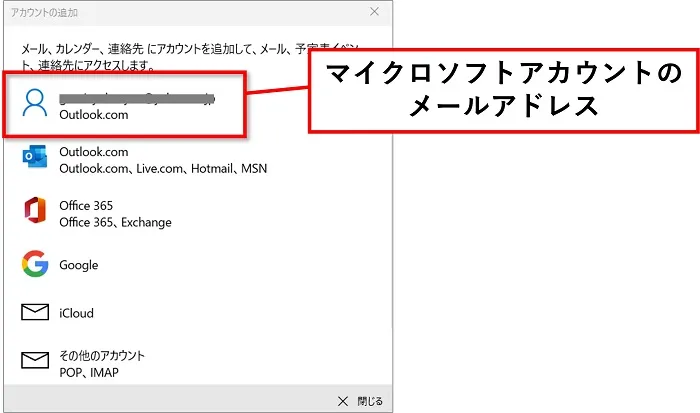
マイクロソフトアカウントで設定する場合
ちあきマイクロソフトアカウントでメール設定をするのが一番簡単です。
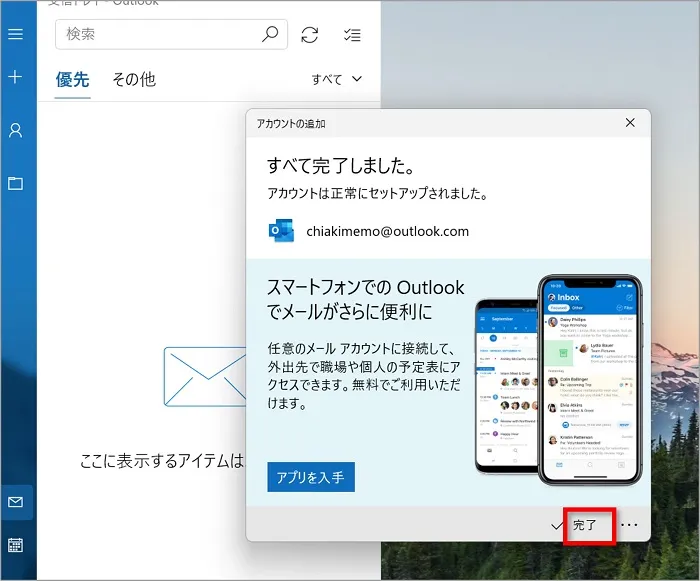
①一番上に表示されているマイクロソフトアカウントのメールアドレスをクリックします。
②「すべて完了しました」と表示されたら「完了」をクリックします。
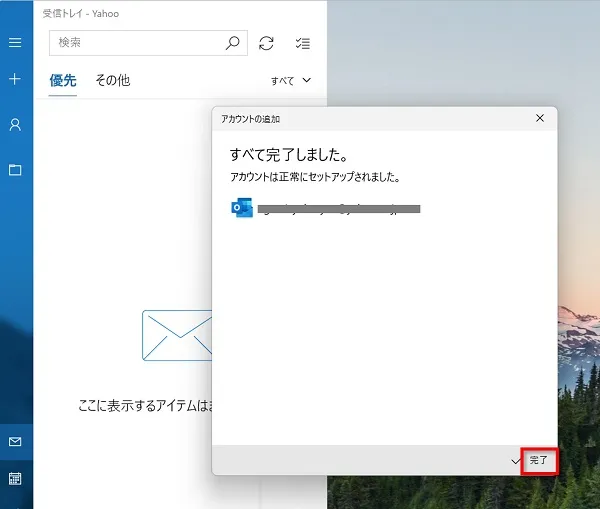
以上で設定か完了です。
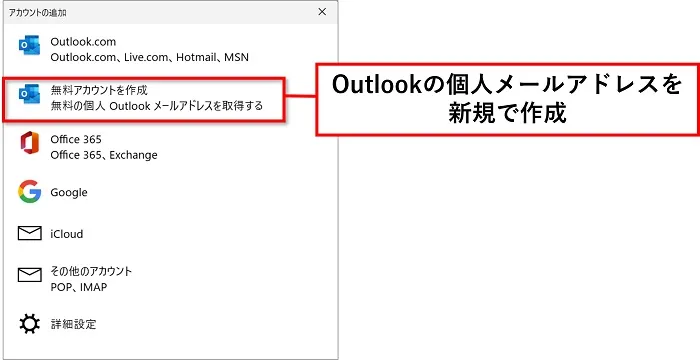
Outlookの個人メールアドレスを新規で作成したい場合
ちあきOutlookの個人メールアドレスを新規で作成することも可能です。
①「無料アカウントを作成」をクリックします。
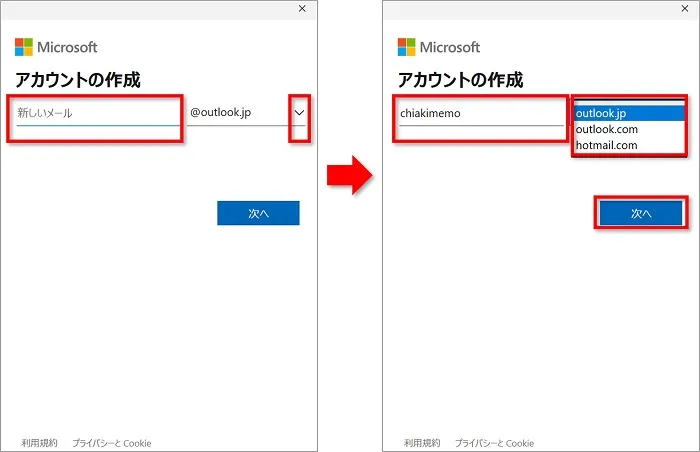
②お好きなメールアドレスを作成し、「次へ」をクリックします。
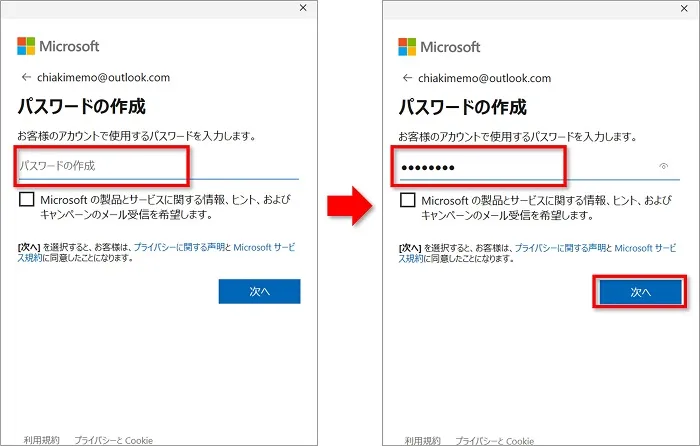
③お好きなパスワードを入力し、「次へ」をクリックします。
あらかじめマイクロソフトアカウントで「メール」を設定している場合、このあと複数の指示が表示されます。
- 「アカウントでのWindows Helloの使用」⇒「OK」
- 「ユーザーを確認しています」⇒指示に従いPINコード等の入力
その都度退所していけば問題なくメールアドレスを作成することができます。
④「すべて完了しました」と表示されたら「完了」をクリックします。
以上で設定か完了です。
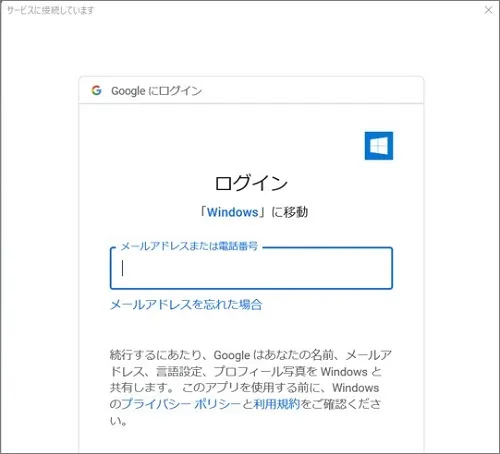
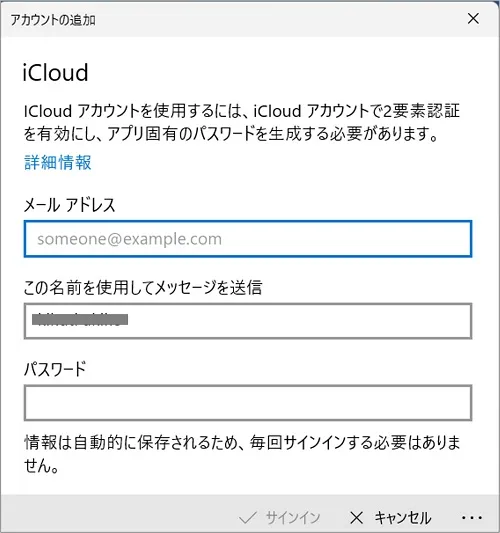
「Gmaill」や「iCloud」で設定する場合
「Gmaill」や「iCloud」で設定する場合でも、基本的にやり方は同じです。
設定したいメールサービスをクリックし、指示に従い入力をしていきます。
「Google」をクリックし指示に従います。
「iCloud」をクリックし、指示に従います。
 ちあき
ちあき比較的「Gメール」で設定する人が多い印象です。
その他のメールアドレスで設定したい場合
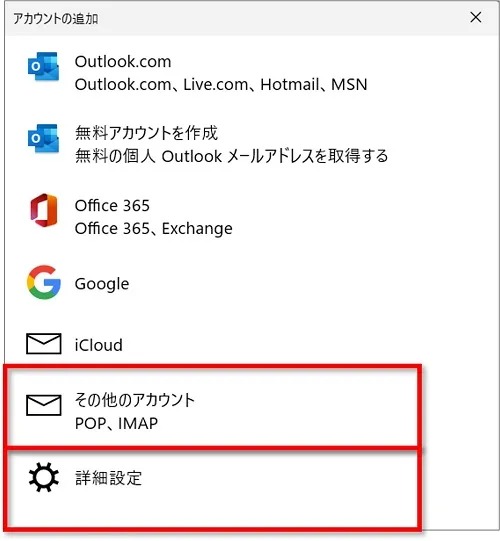
- その他のアカウント
-
表示されている以外のメールアドレスで設定したい場合は、その他のアカウントから設定することができます。
- 詳細設定
-
プロバイダーメールは詳細設定から設定します。
ちあきプロバイダーメールを設定するときは、事前にプロバイダー契約をしたときの書類等を準備しておきましょう。
おわりに
Windows10/11標準搭載の「メール」アプリにアカウントを設定する方法を紹介してきました。
Windows10以前からあるOutlookメールを私用していた人には逆に使いにくく感じるかもしれない「メール」アプリですが、使ってみると単純なので意外に簡単です。
まだWindowsでメール設定をしたことがない人なら、この「メール」アプリの方が簡単だと思います。
試しに使ってみてくださいね。